The Copic Colorless Blender doesn’t blend ink so much as it just moves it around. If you are really looking to blend your colors, unless they are very light colors, you are better off looking at blending using the actual inks involved in your illustration.
When choosing the best Copic marker sets to start with, you don’t really have to take the Colorless Blender into consideration. You will be able to blend perfectly well using two colored Copics. However, with a little practice there are some useful ways to bring the Colorless Blender into you work.
Colorless blender techniques
There are many ways to use the Copic Colorless Blender, and only one of them is for blending color. Odd right? It’s a strange name to choose for something which only blends part of the time, especially for those of you who are just getting started with Copic pens. Using it right can be essential to correct even shading with Copic markers.
You will want to deploy the colorless blender when: fixing mistakes, lightening areas of color, adding a little depth or texture to an inked area and when blending.
Why isn’t the Copic Colorless Blender just for blending

The Copic Colorless blender is pigment free and so it will not lay down any color at all. Why am I telling you this? Because here’s the way to think about blending with Copic markers: any light colored Copic will move the ink of a dark colored copic and start to mingle the two sets of pigments giving you a good blend – just think of the colorless blender as the lightest Copic marker out there.
How to Use Copic Colorless Blender
Basic Techniques with the Copic Colorless Blender
Mastering the Copic colorless blender can add depth and sophistication to your artwork by enabling smooth transitions and blending between colors. Here are exercises designed to enhance your skill set with this indispensable tool.
Creating Smooth Transitions
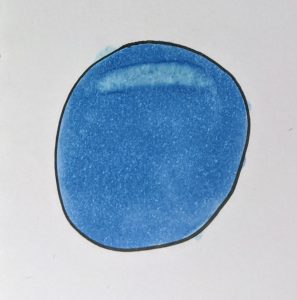
Exercise: Blending a Sky from Blue to White
- Select Your Blue Shade: Choose a blue marker that closely resembles the sky. This color will be used to create a gradient that seamlessly transitions into white.
- Apply the Blue: Start at one end of your paper, applying the blue color densely. Gradually lessen the application pressure as you move towards the opposite end, leaving the final section untouched by the blue marker.
- Use the Colorless Blender: Beginning from the white section, use the Copic colorless blender to blend into the area where the blue begins. Each stroke should slightly extend further into the blue area, using the colorless blender to dilute and spread the pigment, achieving a smooth transition from blue to white.
Exercise Goal: Master the technique of creating smooth transitions to simulate the natural lightening of the sky towards the horizon.
Blending Two Colors Together
Exercise: Designing a Gradient Mountain Landscape
- Choose Two Colors: Select a deep green for the base of the mountains and a lighter green for the mountain tops to represent sunlight hitting the peaks. On your paper, sketch out a simple mountain range with peaks and valleys.
- Apply the Colors: Fill in the lower parts of the mountains with the deep green, gradually transitioning to the lighter green as you move up to the peaks. Ensure there’s a slight overlap between the two colors to facilitate blending.
- Blend the Colors: Position the Copic colorless blender at the point where the light and deep greens meet. Use gentle, upward strokes to blend the colors together, creating a smooth transition that mimics the natural gradation of mountains in the distance. The goal is to achieve a gradient effect that gives the landscape depth and dimension.
Exercise Goal: This exercise is designed to help you become adept at using the Copic colorless blender to create a picturesque mountain landscape. By blending two shades of green, you’ll learn to give the illusion of sunlight and shadow across the terrain, enhancing the realism of your artwork.
By mastering this blending technique, you’ll improve your skill in creating natural landscapes and atmospheric effects with your artwork. The Copic colorless blender is a powerful tool for achieving nuanced transitions and textures, essential for bringing your creative visions to life. Regular practice with projects like this will enable you to utilize the full potential of your blending tools in diverse and imaginative ways.
Copic Colorless Blender can be used for blending very light colors
The Copic Colorless Blender is the ideal pen when looking to blend to white (or whatever paper you have chosen to use your Copics on). Blending directly to white from a dark hue is difficult to accomplish, unless you are looking for a stark lighting technique. You would most likely pass through lighter and lighter hues before you got to white. In this case you could consider the Colorless Blender as the lightest pen in a multi-hue blend.
Otherwise, it can be considered the lightest ink in a two ink blend. Say you are working from a C0 (Cool Grey) to white blend. If you weren’t able to achieve a suitable blend through other methods (flicking etc), you could lay down the C0 first, the blend into it from the lightest point using your Colorless Blender (as you would with any lighter pen).
Copic Colorless Blender is for fixing mistakes
Because the Copic Colorless Blender is perfect at moving the ink, you can use it to move ink from where it has accidentally been applied.

The quicker you can address the mistake the better. This works by distributing the ink out so that it fades to almost nothing, as well as directing the pigment back towards the colored area. The nib will also pick some of the original ink up while carrying out this job, which can then be discarded by scribbling on a spare piece of paper or card.

Copic Colorless Blender is for lightening
Much as we encourage you to use the Copic Colorless Blender to blend with the lightest of tones to white, you can use the pen to bring light patches to applied ink. By using the pen to simply move pigment around, you can reveal more of the paper’s original hue.
Apart from some of the pigmentation which may get picked up on the nib, you will only be redistributing the color already on the page, not magically making it disappear. So you will need to be aware of building up a darker ridge of color around the area you are lightening. Light flicks will be your friend in this instance.
Use it to add depth
Using the Copic Colorless Blender you can add texture and depth to colored parts of an illustration. One of the main selling points of Copic markers is there ability to give you a smooth, even coloring. But what if you didn’t want that classic smooth finish? There are a variety of techniques you can use with a Copic Colorless blender to bring a little controlled chaos to your finish.

To avoid a wet mess, you won’t want to bring too much motion to the process. Your best bet is it hold either end of the marker over the area you are looking to add texture to for a couple of seconds and then lift the pen. The released alcohol will ‘push’ the pigments away from the area touched, how much will depend on how long you hold, how dry the ink is and how dark it originally was. To be safe, you should try out a few approaches on a spare piece of paper before committing it to your work.
How do you make a colorless blender?
You can make a colorless blender with a Copic Colorless Blender refill and an empty Copic pen. Through the process of acquiring Copics, you may well find your self with two copies of the same color. It’s then an easy process to commandeer one of the bodies of these pens once it runs dry and top it up with the colorless refill.

Why would you do this? As we’ve established, the cost of Copic markers plummets when you move away from buying pens and start topping up pens you already have. This point is just as pertinent when considering the colorless blender. If there’s a spare empty lying around, save some money by creating your own – just mark it up with some tape so you remember it is your colorless blender.
How do you clean blending markers?
The Copic Colorless Blender is the most exposed pen when it comes to discoloration of nibs, but it is nothing to worry about. Through use, the pen is bound to pick up pigment from the colors it is being used against, which will result in staining the fibres in the nib. Using a spare surface, make sure to use the blender until it runs clean. If the liquid is clear but the nib is discolored, it won’t impact your future use – it is locked fast.
This is the same principal we found when using Copic pens with pencil. The graphite stains the nib, but doesn’t compromise use.
FAQ: Mastering the Copic Colorless Blender
What is the Copic Colorless Blender primarily used for if not just blending?
The Copic Colorless Blender is versatile, serving not only to blend light colors but also to fix mistakes, lighten areas, add texture or depth, and achieve even shading. Its pigment-free nature means it moves ink around rather than blending it traditionally.
Can the Colorless Blender blend any colors effectively?
While it’s most effective with very light colors, blending to white or between light shades, it’s not always the best choice for blending darker or more saturated colors. In those cases, using two colored Copics for blending might yield better results.
How does the Colorless Blender work with Copic markers?
Think of the Colorless Blender as the lightest Copic marker available. It works by pushing and diluting the pigment of colored inks, enabling subtle blends and corrections.
When should I use the Copic Colorless Blender?
Use it for correcting overshoots, lightening specific areas for highlights or textures, and blending light colors. It’s also great for creating effects like depth or texture within colored sections.
Why isn’t the Colorless Blender effective for all blending?
Its solvent-based formula is designed to move ink rather than mix colors directly. For darker colors, blending with similar or complementary shades often produces a smoother gradient.
What are some creative techniques with the Colorless Blender?
Beyond blending, you can use it to create textures, correct color overspills, lighten areas, and add highlights or depth. Experimenting with different pressures and movements can yield various artistic effects. For more advanced techniques with alcohol markers, it’s worth visiting Sandy Allnock’s site.
Can I make my own Copic Colorless Blender?
Yes, you can create a DIY Colorless Blender using a Copic Colorless Blender refill and an empty Copic pen. This can be a cost-effective way to replenish your blender supply.
How do I clean my Colorless Blender after use?
After use, especially if the nib picks up color from other markers, simply scribble on spare paper until it runs clear. Staining on the nib doesn’t affect performance, as the solvent inside remains colorless.
Is it necessary to include the Colorless Blender in my starter set?
While not essential, incorporating the Colorless Blender into your toolkit can enhance your work by providing additional control over shading and corrections. It’s a valuable tool for both beginners and experienced artists.
Can the Colorless Blender remove ink completely?
The blender is more about moving and diluting ink rather than erasing it. For mistakes or overspill, it can spread the ink to reduce visibility, but it won’t remove ink completely from the paper.
By understanding the capabilities and limitations of the Copic Colorless Blender, artists can effectively incorporate this tool into their creative process, whether for blending subtle shades, correcting errors, or adding unique textures to their artwork.